Mealworms Farming Setup at Home: Space, Tools, and Environment
Mealworms farming can be started at home using simple tools and limited space. Many beginners choose home-based farming because it allows learning the process without large investment or complex infrastructure.
This article explains how to set up a basic mealworms farm at home, including space requirements, tools, and environmental conditions. Read complete mealworms farming basics in a practical and beginner-friendly way.
Is Home-Based Mealworms Farming Practical?
Mealworms farming does not require farmland or outdoor space. It can be done indoors using shelves, storage rooms, or unused areas of a house.
Home-based farming is suitable for:
- Learning purposes
- Small-scale feed production
- Research and educational use
Proper planning is more important than space size.
Space Requirements
Mealworms farming can be started in a small area.
Recommended Spaces
- Storerooms
- Spare rooms
- Shelves in a quiet indoor area
The space should be:
- Protected from direct sunlight
- Free from excessive dust or moisture
- Easy to monitor daily
Large space is not necessary for beginners.
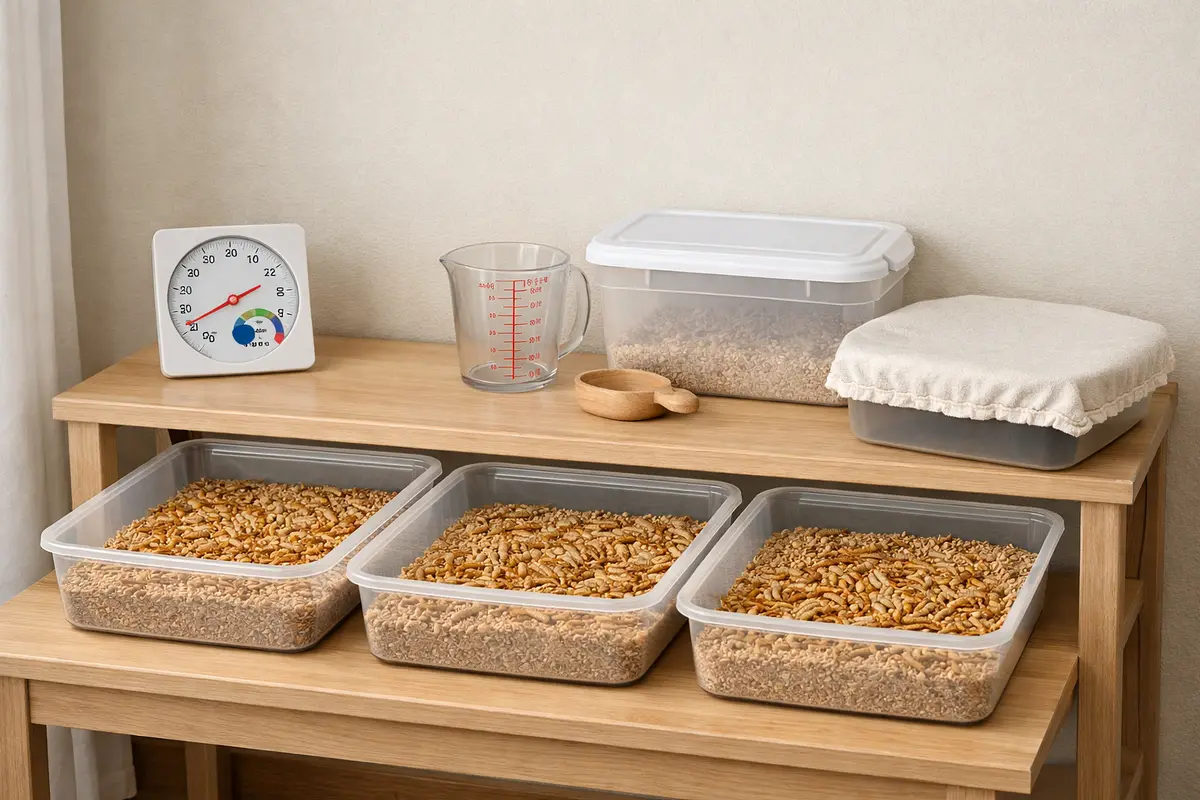
Containers and Tray System
Types of Containers
Plastic trays or boxes are commonly used because they are:
- Lightweight
- Easy to clean
- Resistant to moisture
Trays should have shallow depth and smooth sides to prevent insects from escaping.
Tray Arrangement
- Trays can be stacked on shelves
- Adequate spacing should be maintained for airflow
- Each tray should be easy to remove and inspect
Organized trays help manage different life stages.
Bedding and Feed Materials
Bedding
Wheat bran is widely used as bedding. It also serves as the primary food source.
The bedding should be:
- Dry
- Free from mold
- Replaced periodically
Moisture Sources
Mealworms obtain moisture from vegetables such as:
- Carrots
- Potatoes
Vegetables should be added in small quantities and removed before they spoil.
Temperature Control
Mealworms grow best in warm conditions.
- Ideal temperature range: 25°C to 30°C
- Growth slows significantly below this range
In colder environments:
- Insulated rooms help maintain warmth
- Temperature stability is more important than exact numbers
Avoid sudden temperature changes.
Humidity and Ventilation
Humidity
Excess humidity is one of the biggest causes of problems.
To control humidity:
- Keep trays dry
- Avoid wet feed
- Limit moisture sources
Ventilation
Good airflow prevents mold and odors.
- Use ventilated lids or mesh
- Avoid sealing containers completely
Balanced ventilation supports healthy growth.
Light and Noise Considerations
Mealworms prefer:
- Low-light or dark environments
- Quiet surroundings
They should not be exposed to:
- Direct sunlight
- Strong artificial lighting
- Vibrations or constant disturbance
Stable conditions reduce stress and mortality.
Hygiene and Maintenance
Regular maintenance is essential. Read common problems in mealworms farming for more details.
Basic practices include:
- Removing waste and dead insects
- Replacing old feed
- Cleaning trays periodically
- Monitoring for mold or mites
Clean farming reduces most common problems.
Safety and Household Considerations
When farming at home:
- Keep trays away from food preparation areas
- Store feed properly
- Maintain cleanliness
Mealworms farming should be treated like any other small-scale animal care activity.
Conclusion
Setting up mealworms farming at home is practical and manageable for beginners. With proper space selection, basic tools, controlled temperature, and good hygiene, a small home setup can function effectively.
Understanding these setup fundamentals helps learners build a stable foundation before expanding or experimenting further.